Feb 26, 2006 - Changes completed - for now...

Feb 24, 2006 - Changing my Template! Bear with me. This is a work in Progress!

www.flickr.com
This is a Flickr badge showing public photos from TexasT's tagged with modelrailroading. Make your own badge here.
My Photo
Name:
Location: Houston, Texas, United States

It ain't the years, It's the mileage. I was raised a military brat, and wanderlust still comes over me every 3 or 4 years. Still love to travel.

Sunday, January 22, 2006

So I Chickened Out on Weathering That Flat

Lest you think I have done nothing over the weekend. Just a quick post...

Test Track Update:

Ballasting was the name of the game this weekend. Using Russell Straw's suggested technique using a type of foam type painting brush to spread the ballast. Hope to be finished tomorrow and maybe I can throw up some pictures...Ballasting track, no matter how I do it, seems to be a slow business. And it should be too.

Track is a model too!

2006_0115WhiteBalance0011

The crew over on the NSCALE forum on TrainBoard have really taught me a lot over the last few months. I think the track I laid on this test track experiment is probably some of the best work I've ever done in Model Railroading. It seems to be just about Bullet-proof!

Thanks, fellas! Couldn't have done it without ya!

...TexasT's

Saturday, January 21, 2006

So Maybe I'm Just Not Ready to Really...

Beat up a perfectly good (and pristine) MT Car yet. But I did pose the question over on TrainBoard the other day.

"
Okay fellas, now here's a bit of a problem that has plagued me since I started modelling. What is (are) the technique(s) to take molded plastic wood like on this car And make it look well used and abused:
Heavy Duty Flat

That bunch in the NScale forum on TB are greatly knowledgable about hall things NScale. I got several good responses. Read on:

PowerSteamGuy says:
There is an article on how to age wood on plastic models in the February issue of RMC. It's very comprehensive and has quite a few pictures.It's well worth reading.

In summary you must airbrush different color paints to acheive a well worn look.


Yeah, I'd read that article. I think it's what made me ask the question. And I don't happen to own an Airbrush. There are people like me out there...Somewhere's

Fotheringill Says:
Or chalks.


Hmmm. Now this holds some promise. Although I know next to nothing about using chalks. I bet if someone pointed me in the right direction, I could figure that one out. I asked him how he fixed the materials to the surfaces. He had posted a great example of how he did one.

I actually have never used Dullcote or anything else on a weathered car. I just don't pick it up with a thumb and forefinger on its top and bottom. I never even needed a recoat and that is for a guy with lousy trackwork. The stuff doesn't seem to rub off when I do touch it.


Here's Paul Downs:
To add some wood grain, use coarse sand paper or the edge of a file. I like to paint the entire deck with an aged wood color, like an ash gray, and then dry brush the finish color over the aged "wood". Then you could add additional weathering, using paint or chalk.


John Moore goes even further.

John Moore:
I use a razor saw blade drug across the plastic to give plastic the grainage, Usually a fine tooth razor saw but a coarser tooth one will give some deeper grainage to the plastic. Then there is the old ship modelers technique after that. Thin coats of green, black, and woodtan, also maybe some grey, letting each dry thoroughly. Sand some off before each color application and you end up with a seasoned peice of wood. Lightly sand the final coat of color to let the others show through some here and there. Same thing can be done if one is good at dry brushing colors.
Finally weather it using anything from the dregs in the paint brush rinse jar to weathering materials to fill in the grainage created with the razor saw.

I would suggest practicing on a useless piece of plastic first before tackling that nice flat.
Now I really respect what this Master Modeller has to say, you should see his work on TB. I read ALL his stuff.
Then r_l_straw weighed in:

Russell Straw

Instead of chalk, I use MAC eye shadow makeup. It comes in some rusty, earthy and smokey colors and does not have the sparkle mica dust so is very flat looking. It does not seem to rub off as easy as chalk with my fat fingers. (I like to fondle my cars) It is more expensive than chalk however. I have found that when you spray Dullcote over any dry weathering it soaks up the pigment and causes the effect to almost go away. I have also found that over the years Dullcote can yellow. I suppose that is not bad for some weathering.


Now I've seen Russ' stuff Live and in Person. His NTRAK modules have won awards. Listen...to da man.

PowerSteamGuy came back with detail and a link:

PSG:
You can also try the Bragdon Enterprises weathering system. This material bonds nicely to any surface after it's applied and rubbed on.


Bragdon Enterprises weathering system


And Bragdon Enterprises stuff looks great. Next time I'm in a Hobby Shop I'll check them out.

But I just can not make myself do that to that car!

YET!

Thursday, January 19, 2006

Until You Read the Manual - You Just Never Know

What your equipment is capable of...

Remember the old adages, "Manuals? We don' need no steenkin' manuals"? and, "Real men don't read manuals"?

As with most of the pictures I post, click them for a larger (hence better) view.

2006_0115WhiteBalance0009I have been shooting pictures with a Fuji FinePix A210. It's a plastic bodied digital camera, nothing special. Wasn't expensive, and you can take a decent picture with it. Examples?? Okay, go to TexasT's on flickr and look at my photo stream and you'll see what I mean. It is also possible to take some very B-AA-A--D pictures with it that mostly no one ever sees. But that's the beauty of digital photography, now isn't it? A decent graphics editor, such as Adobe Photoshop or Corel PaintShopPro can make photos relatively easy to fix, provided you go up the learning curve to figure out what the software is capable of.

2006_0115WhiteBalance0014But that isn't what this post is about...

So I was reading the manual for my camera the other night...I learned a long time ago - Read the manual first! But I must have skipped though the manual part of the manual. There's is a menu setting in manual mode for different types of lighting. At least 5 different settings. WOW! "Shooting under daylight flourescents" is one of the settings. Now guess what kind of lights I have over my desk in the garage...

2006_0115WhiteBalance0024That's right, I've got
daylights in that puppy. Now I won't tell a story here. Well, not a whopper anyway. Almost every picture I'd taken of the Test Track stuff had required some software tweaking. Unless I'd had the garage door open. And some needed A LOT OF TWEAKING!

Now being a simple kind of guy, I'd rather not have to tweak anything...If I ain't got to waste a lot of time doing that kind of stuff, I won't. 'Cause I ain't really got a lot of time to waste! Unless of course, I'm trying to learn something.


2006_0115WhiteBalance0006So this last batch of photos I took of my Test Track. I took a few in auto mode and quite a few with the white balance set for "Daylights". The difference was quite dramatic. It was so different in fact, I deleted the photos taken before I adjusted the White Balance.

2006_0108Image0003All of the pictures in this post except this one, on the left, have white balance adjusted for daylights and you can (well, I can) really tell the difference! I don't think I "tweaked" one of them.

I don't think I'm quite ready for Helicon Focus. Well, I might be ready, but I don't think my camera is.


Right now, I gotta get back to my manual...

Next Entry: Plastic Wood??

Sunday, January 15, 2006

Radio Shack's Rare Earth Magnets - Part Two

Or Model Railroading Fun with Magnetism

As I said in the last post, the are two schools of thought on this on the NScale group on Trainboard

Here's the test bed. Track is Atlas Code 55. You can see the three sets of magnets. One set stacked, one set at the end of a curve, and one in the middle of a straight run.

2006_0115WhiteBalance0008

As you can see in this next picture, the first set were mounted flush with the tops of the ties. When I stopped a couple of cars over them, MT Cars did not uncouple.

2006_0115WhiteBalance0004

However, using an Atlas car with accumates - they did uncouple. But it was because the accumate trip pin was pulled right down onto the magnet, at that point it was low enough for the other coupler to clear it. It was stuck fast to the magnet. Not good. Could be a source for derailments.


Guess it works on unitrack. Just not my track.

As you can see the second set of magnets were mounted underneath each rail, but at the end of a curve. (Tracks at the top of the next photo)The cars uncoupled about 30% of the time - if you ran the couplers back and forth over the magnets...

2006_0115WhiteBalance0006

The tracks in the bottom of the photo uncoupled almost everytime. Before I glue them in I need to "tweak" them a little, I think. The others will be removed or relocated.

You can see the couplers in the "Open" position in the somewhat blurry picture below:

2006_0115WhiteBalance0012

Sorry about that last one. But there it is...

Next post: Playing with the White Balance on my Camera.

Radio Shack's Rare Earth Magnets - Part One

There was a lively discussion, in the not too far past, on TrainBoard.com, in the Nscale group, about using Radio Shack's Rare Earth Magnets for uncoupling. After reading all of the posts I was still somewhat skeptical of magnetic uncoupling itself.

Before the thread on TB I had heard a lot of folks with a helluva lot more experience than me were using Magnematic couplers, but using Skewers or a Rix Pick, or the like to uncouple their cars. Because of the unreliability: No Magnets on the layouts.

I had heard a lot of negatives about Kadee (HO) and Microtrains (N) not to mention Accumates which are multiscale. Unexpected uncoupling, Exploding couplers, etc. The unreliability when I first started in MRR (long ago) was enough to make me stick to the Rapido type couplers. That and the fact that most equipment came with rapido couplers was pretty much a deal killer for me. Come 2005 though, and I see a lot of equipment in N Scale being shipped with knuckle type couplers.

A lot of model Railroad tech has changed in the last few years and I'm not hearing as many negatives about magnetic uncoupling as I used to. But all of the equipment I had up to this point, of course, had rapido couplers. Okay, I thought, maybe I should revisit magnetic uncoupling. I see a lot of experience on TB in the Positive, not all, but most, folks are using some type of knuckle or magnetic couplers with magnetic uncoupling.

Time for an experiment...This could be pretty interesting. Where to start? Well, (of course) I would need some equipment that has these types of couplers. So first I decided to convert my ATSF Kato F7's to MicroTrains couplers. Got some couplers for the F7's. The A unit was a real task. It was so much of a task it took 2 posts and a lot of discussion on TrainBoard.com to get through it.

Part 1 is here: My First Coupler Conversion for a Locomotive - Part 1
Part 2 is here: My First Coupler Conversion for a Locomotive - Part 2

I had found out about midway through the operation that the first generation Kato F7 coupler conversions was a real bugbear...And it was.

Shortly thereafter I picked up My First MicroTrains Freight Car.

And my curiosity was peaked. But I got distracted by some other projects for a while. Then I worked for WigWag at the World's Greatest Hobby Train Show here in H-Town and I picked up some more equipment. An Atlas Shell Chemical Tank Car and an Atlas MOPAC MP15. Both have Accumate couplers. I've also picked up some other Micro-Trains couplers too.

I was now ready to try this.

Went by the Local Radioshack and picked up 2 packages:
Rare Earth Super Magnets - 1/8" Button Catalog #: 64-1895 They are cheap. $1.89 per package. And quite small. As I said before, these tiny things are really powerful. Difficult to pry apart. Once I got the first pair apart and inadvertently put them together (or as close as they could get) on opposite poles, they literally flew apart. I found one of them on the leg of my chair and the other was stuck to the edge of my work table...three feet away.

So I started a new thread on trainboard.com about magnet placement: Where to place uncoupling magnets. The question was actually about where to put them. I never did get a real answer as to placement, but we did have another lively discussion about how to place them.

One school of thought is to put one disk under each rail at the point of uncoupling. On code 80 atlas track at the end of the rail there is a space where they just seem to snap in. This space is (of course) smaller on code 55 and the magnets will not fit there.

The other is to stack two between the ties with the topmost magnet about even with the top of the ties.

I tried it both ways.

Next post: The experiment bears fruit!


Wednesday, January 11, 2006

World's Greatest Hobby Show Loot!

I worked for George of Wig-Wag-Trains on Friday before the show and Sunday after. As they said on their web page, the work wasn't too hard, but it was mindless. Pretty much for the crew that was helping them anyway.

We (Houston as a whole) didn't do much for 'em. I think they took way too much stock home. However, I think I can now recommend Wig Wag for your Nscale needs. They had about the best pricing I've seen. Pricing sure beats the hell out of our local guys (on most things). And they ain't bad either.

Have to tell George if he gets any additional H-town biz, he owes me a finders fee...

Doggone shame though about the locals. I mean I understand about overhead and shit, but damn, Wig Wag is Brick and Mortar too!

These guys brought more stuff than the locals stock.

Okay so, stepping down off the soapbox now...


Let's get to the good stuff.


Picked up an Atlas MoPac Standard Caboose, (Did MOPAC have any Standard Cabeese? Not from what I've seen) that will be a basis for a good kitbash, but not until after I ruin an old ConRail hack I've had around here for years for practice. It's got rapido couplers, but some pretty good low profile (plastic) wheelsets that seem to roll very freely on my test track. Didn't get a decent picture of the thing tonight, so that will just have to wait. Besides it's just a new caboose. Whoop-ty-doo!


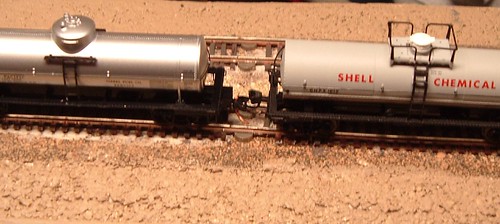
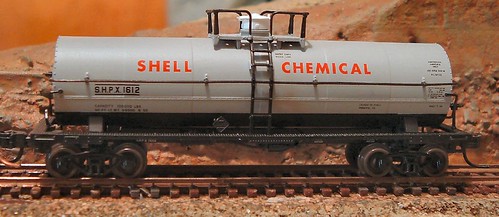
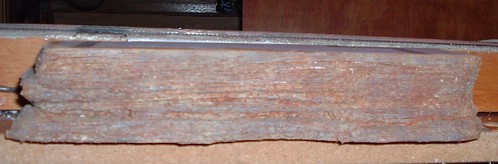
Next wanger was an 11,000 gallon tank car (Atlas) lettered for Shell Chemical. SHPX1612. Now I dunno if the Big Clam ever used this car (couldn't find a reference for it by googling it, but that doesn't matter), but those of you that know me, know I like the Shell stuff. Dunno why...HaHa! This beauty has low profile wheels, again very freewheeling, and Accumate couplers. Not quite Micro Trains, but still very cool. Paint is real nice too. This car came in 2 road numbers and I meant to pick the other one up Sunday from Wig Wag. But by the time I remembered all the Atlas was packed up. Here's a quick pic:

11KGal Tank SCC 1


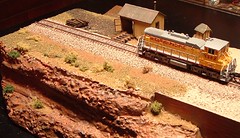
But the real deal, was a new Atlas MP15, painted in UP Armour Yellow and gray, but lettered for Missouri Pacific. Runs Great, too. Creeps along at low power. Detail is nice with accumate couplers. Take a look at this brute:
MP15 DC 2

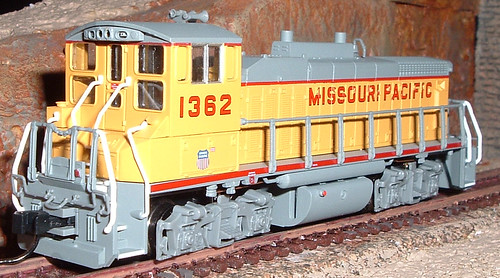
I hear Atlas will be producing 2 in Jenks Blue in the next run. Sweet! These are some fine machines.


That's my haul.


In other modeling news - I spent some time this weekend playing with some of Radio Shack's Rare Earth Magnets. I'll be using those for uncoupling. Man, are they strong!


And Cheap too! But that's my next post...


Adios!

Monday, January 02, 2006

Idle Hands are the Devil's Workshop!

So I've been a little busy...Tried to work up some rock faces today. 1.Start with an Acrylic Burnt Sienna and Cadmium Yellow mix...

YIKES! That is really RED!

2006_0102Rocks1
Pardon my shadow in that shot.

Then work at burnishing the faces with...
Would you believe? Poly Scale "Depot Buff"

2006_0102Rocks2

After that another burnish with Poly Scale "Pacemaker Gray"


2006_0102Rocks3

In this light though, it looks to be too much gray.

2006_0102Rocks4

Maybe dry brush another coat of "Buff"


Oh yeah! Just for fun...Worked here too!

Test Track Tunnel Portal

Happy 2006!!